Finally getting to the end on this house renovation. This week I got to finally work with some wood, albeit only plywood.

The front bedroom needs some built-ins in the alcoves to right and left of the chimney breast. I’ve already made some plinths, because the idea is to stand cabinets in the holes, rather than try to deal with hanging shelving onto the wall. The walls in these corners are in quite bad shape, as is often the case with older houses. The walls elsewhere are great, but one had to be entirely re-plastered.
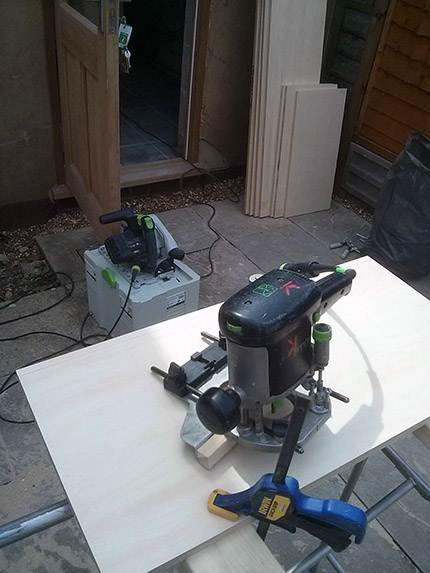
I built the cabinets with birch ply and have routed out the rear to accept a ply back board. I did all this on a rare sunny day in London and I have to admit I was very pleased I’ve recently invested in a secondhand Festool router, (so old it’s actually pre-Festool and called Festo). I also have a secondhand TS55 plunge saw from Festool and these two tools are worth their weight in gold for this type of work.
All the sheet stock is now prepped to size and I lipped the shelves with tulipwood, so that you don’t see the raw ply edges. The shelves have had two coats of clear varnish.


When I get to put the cabinets together, (I don’t have a Domino), I’ll screw the main parts together and maybe even screw the shelves in too. Not sure they’ll need to be moved much, so might avoid doing the shelf-pin-hole thing. I figure I’ll then add pocket holes around the outside and once I’ve sized up for a face frame to hide the cabinet edges, I can attach in that way.
Only other decision is whether I should attached the doors to the face frame, or size the face frame so it’s nearly flush and add hinges to the inside of the box in the conventional way.


Any thoughts on both methods would be appreciated. The first method will require some proper face-frame hinges and would also require face-frame material of a good quality. Something like maple with good strength, which would be more resilient to knocks. I could circumvent this by going down the second route, the face-frame being decorative with Euro-style hinges attached to the box. I’ll have to decide on this.