Almost continual rain in London yesterday, but a moment’s clear sky allowed me twenty minutes to do a bit of work. A quick rebate for a floor edge I need to finish on a step in the house. A groove with my Record 044, then the waste hogged out with a Stanley 5 1/2. The sharpened blade of the Record 042 shoulder plane squared things up perfectly. Lovely.
Tag: Stanley
New Work, Old Tools
The weekend comes round again and ‘dad jobs’ raise their ugly head. This weekend, finishing a small bathroom cabinet I’ve thrown together in a bit of a rush, before relatives arrive next week. And to be honest, I’ve thrown it together so quickly, my idea for little sliding doors just isn’t working out. I reckoned I could get a couple of bits of Perspex cut and mount it in runners, but I’ve fixed the runner in place with a gap that’s too narrow for the door.
I suddenly remembered my little Stanley 98 & 99 side-rebate planes, which ended up saving the day. The 98 opened up the gap a treat and now the door slides smoothly. Normality is restored in the house, I can go back to my beer.
Revel in the beauty that is the Stanley No.7 Jointer plane.


[notice]Tool Nerd Alert! The following information is reserved for people who, like me, probably should get out and socialise a bit more.[/notice]
I believe this plane is a Type 11. It has rosewood handle, and the front knob is a ‘low’ version. Manufacture date is therefore 1910-1918, and the blade should carry a pretty wacky ‘V’ ‘Stanley, New Britain, Conn, USA’ logo. It has a small brass depth adjuster nut and it has the ‘APR-19-10’ patent date added behind the other dates on the plane casting, behind the frog. Please let me know if I’ve got this wrong. You learn by your mistakes!


Jointer planes like this one, are used to true an edge, so that successive pieces butt up against one another very closely, or they’re used to get the face of a piece of wood very flat. At 22″ long, it’s one of Stanley’s biggest planes, being only secondary to the No.8, which is 24″. Jointers are long planes because the ‘sole’ of the plane is less likely to follow the ups and downs of the wood, but will instead remove the high and lows, ready for planing with a smaller-sized plane.
I think these planes are just beautiful, and for not much money, you can snag one on an online auction site, and have a killer tool working in no time. If the one you find is rough, rusty and looks like crap, this is the sort of thing you need to do.
So there it is. The second of my Bailey family.
I buy old, good quality woodworking tools. If you have any tools you would like to sell, please get in touch using the contact form on the home page.
Meet the Baileys (Part 1)
This is the standard Stanley plane, designed by Leonard Bailey, of Boston Massachusetts. This one is a ‘No.4’, and sits in a middling position on the size scale, from the diminutive ‘No.1’, through to the large jointer, the ‘No.8’. I’ll soon be posting a some more detailed info about Leonard Bailey, and his association with Stanley as a separate page. In the meantime, I’ll stand on the shoulders of giants, and point you to the wonderful website of Patrick Leach, Patrick’s Blood & Gore. If you’re looking for information about Stanley tools, Patrick’s website is an absolute must-read.
Patrick’s earlier career was in software. He developed an interest in woodworking early on, and now admits to being a ‘self-confessed tool fanatic.
He has an enviable knowledge of Stanley, and other well-known makers.
A proportion of my own small tool collection is made by Stanley, and it’s becoming something of a mission to build a complete set of Stanley USA-made ‘Bailey’ planes, numbering 1 through to 8. Recently I managed to find my first Bailey, (which is a number 4), from a private sale on the web.


Tool nerd alert! (Quite geeky and unnecessary facts about frog casting variations follow).
The casting in the base of the plane takes a lot of stress holding the frog, which in turn holds the blade, chipbreaker and lever cap. Consequently, the method for holding the frog was constantly being revised by Stanley and was the focus of many new patents. Previous to the design shown, the frog was seated on a flat bed with machined grooves, but in 1902 this new design was introduced. The frog has support from a cross rib and centre rib, and also support on its leading edge from the casting, as well as being held by the two bolts. Planes of this period have ‘PAT’D/MAR-25-02/AUG-19-02’ embossed into the sole of the plane.


Stanley #48 restoration
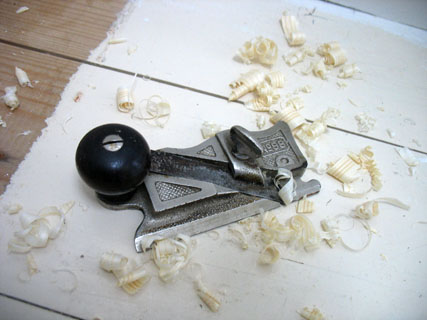
This Stanley #48 is a tonguing and grooving plane. Designed to work on stock from 3/4″ to 1 1/4″, (the groove centers on stock 7/8″). It holds two cutters, and originally the one to the right was a wider one, meaning if you’re working with stock that isn’t 7/8″, the wider cutter will still trim it. To use the plane, you disengage the little sprung pin at the front, which releases the guide rail, and switches to either use one cutter, or two. You’re then set up to make the tongue, or the groove.
This plane has some rust, but should be serviceable once I can get the front pin and guide rail moving. Both are currently seized!
I’m hoping most of this is just surface rust. 🙁
I’ve found the best way to get something moving again usually involves a product called ‘WD40’. But even after several quirts of this, and a short wait, things are staying stubbornly solid.
Flipping the plane over, I can see that the front pin has a hole right through to the base, so in goes another big squirt of ‘WD40’, and the same for the central guide bolt, upon which the guide rail swings.
(Drums fingers on countertop).
TAA-DAA! The pin finally releases, with a bit of help from my pliers. (I put a bit of cloth on the jaws to make sure I didn’t mess up the pin’s head). The guide rail creaks into it’s first swing in years, and I add another liberal spray of ‘WD40’, just for luck.
I’m using a rust removal gel from ‘Hammerite’. A liberal coating goes on with my girlfriend’s toothbrush, (not the one she currently uses, I hasten to add). A wait of 20 mins, and let’s see how much rust comes away.
First application did pretty well, but another two coats and some scrubbing with very fine wire-wool, gets just about everything off.
The finished article gets a good wash of clean water and a dry with my girlfriend’s hairdryer. After that, a quick coat of oil to protect the metal from flash rust, and we’re good to go. The blades have been cleaned, honed and replaced. Just need to put the front rosewood knob back on and I’ll post some pics of this in use soon.
Swing out sister! 🙂