Categories
College Practical techniques

College course: Day 12

Back at college and it seems like we’ve been away for ages. Been looking forward very much to getting back in front of the workbench and getting on with this little cabinet. Here’s how things went today.

Cabinet as I left it before christmas. Lots to do in my remaining four days at college. Sort out drawer rails and make the dovetail drawer. If I'm pressed for time, I can apply finishing at home.
Cabinet as I left it before christmas. Lots to do in my remaining four days at college. Sort out drawer rails and make the dovetail drawer. If I’m pressed for time, I can apply finishing at home.

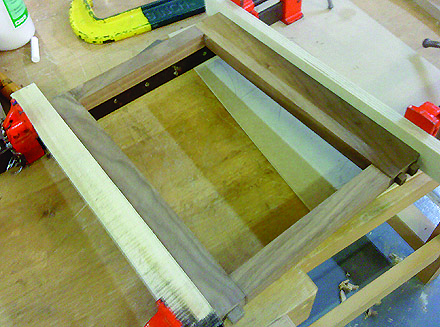
Ok, front and back rail from the bottom of the cabinet taken out, and two drawer rails morticed into them, to provide all-round support for the drawer. I've seen drawer runners installed in a variety of ways, I just figured this was a quick and relatively accurate way for me.
Ok, front and back rail from the bottom of the cabinet taken out, and two drawer rails morticed into them, to provide all-round support for the drawer. I’ve seen drawer runners installed in a variety of ways, I just figured this was a quick and relatively accurate way for me.

Front, rear and side rails for drawers are consequently one unit and can be glued up, ready to be planed flat, meaning hopefully drawer will slide very easily.

Bizarrely, things actually seem square.

The glue-up! Cabinet put back together, with rail frame installed at bottom. Front and rear opening seem to be same size, so I'm hoping that my drawer can be made to fit well. Slightly different apertures, or things out of square,  will make for a drawer that just doesn't work.
The glue-up! Cabinet put back together, with rail frame installed at bottom. Front and rear opening seem to be same size, so I’m hoping that my drawer can be made to fit well. Slightly different apertures, or things out of square, will make for a drawer that just doesn’t work.

Categories
College

College course: Day 11

Good day today. I cut down the shelf which will sit inside the cabinet, and will finish trimming the size on the next day. The bottom rails are both in, so once any odd surfaces are planed to fit, this cabinet can be glued up and I can move onto the final part, the dovetailed drawer.

Here's a shot with one side panel on it's side, and the two rails in place. You can see the rear rails has an identical groove now, so that the back panel can come right down aqnd slot into place. I've used the router to cut a wide groove for the shelf now. Not very conventional, but I just have to get this finished now. The nasty rounded front end left by the router will be obscured by letting in a housing into the front edge of the shelf.
Here’s a shot with one side panel on it’s side, and the two rails in place. You can see the rear rail has an identical groove now, so that the back panel can come right down and slot into place. I’ve used the router to cut a wide groove for the shelf. Not very conventional, but I just have to get this finished now. The nasty rounded front end left by the router will be obscured by letting in a housing into the front edge of the shelf.
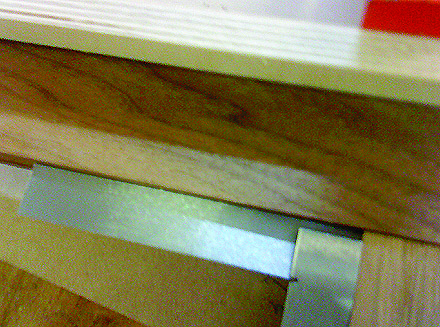
The bottom rail at the front of the cabinet has a double stub tenon. The rear rail is just a single stub tenon.

We finished this year with a good few drinks in a Whitechapel pub round the corner. Conversation covered walks that takes in Dicken’s’ landmarks mentioned in ‘Great Expectations’. Heirloom pieces of furniture, ie are people now buying for quality and craftsmanship, rather than just for low price? And general chat about violins, with the instrument makers who also take up a part of the college’s space. I’ve always wanted to make a violin, perhaps that should be my next course?

Merry Christmas to one and all. Thanks for reading!

Categories
College

College course: Day 10

tormek1
Didn’t get a massive amount done on Friday, although I did grind the iron of a new (old) Stanley No.6, which came out very well. Please imagine the wheel moving for a good half an hour, as I stare into space, with the music of Tony Hart’s ‘gallery’ theme playing along…

Categories
College Practical techniques

College course: Day 9

Day 9! Sort of unbelievable how quickly the time goes, I’m about two-thirds through my course. I’m really enjoying learning about casework and the myriad of details that have to be considered. Anyway, here’s the progress on my little cabinet, for those who are interested. Click the pic for the jump.
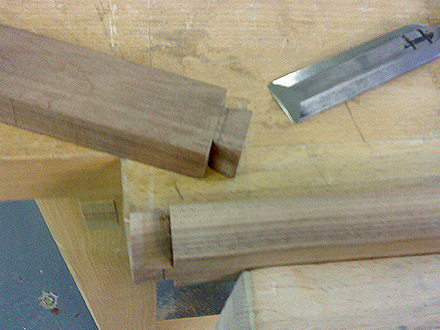
Cutting dovetails in the rails that connect the two side panels I’ve already made.

The dovetails would be a bit deep at the full depth of the stock, so I’m taking off around half the depth here.

The rail dovetail will ft into the top of the side panel as shown. This rail is the rear one, so it needs to be placed so that it doesn’t impede the groove for the back panel, as shown.

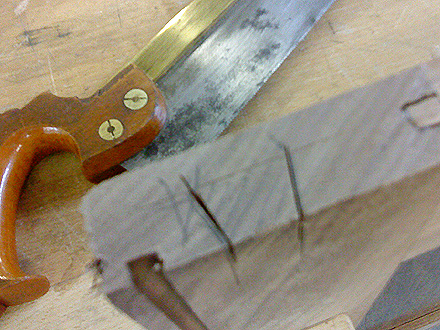
Having drawn around the dovetail, the outside edges are marked. The dovetail length is taken from the dovetail with a marking gauge and transferred to the stock. The same is then done for the depth of the dovetail, which again is marked on the inner panel. The whole waste area is then shaded, so I don’t make mistakes and cut on the wrong side of the line.

After a couple of stiff drinks, the two cuts aren’t bad, and they’re just inside the lines, which is good.

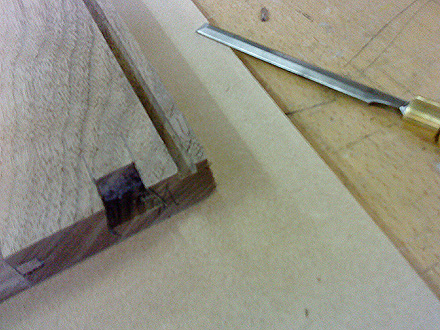
To remove the waste, the panel is clamped down, and little by little, you chop back into the joint with chisel vertical, and remove small amounts by paring into the joint horizontally. Eventually, you have something that looks like this.

Looking back at the image, this is very stupid. If the panels had fallen to the side, it would have cracked my joints. In the semi-hysterical excitement of finally bringing my side panels together, I forgot to notice that. Anyway, the first rail is at least a good tight fit on both ends.

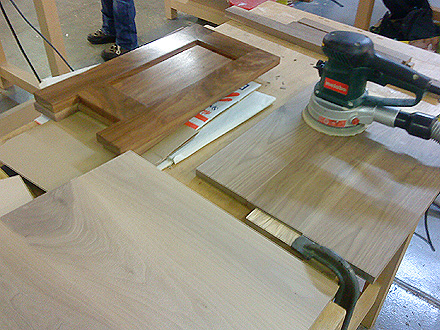
I took a break from the rails, and used the Metabo sander to sand down what will be the top and the shelf for the cabinet. They glued up surprisingly well, and after two passes through the planer, both were pretty good. The top can be trimmed to size once I have the cabinet glued up. The shelf will be worked on next week.

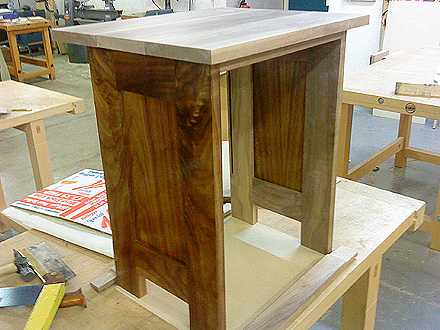
This is the carcass standing upright. Obviously still a little delicate, with no bracing at the bottom yet, but you can see the dimensions. One of my rail joints is sloppy, but hopefully will be ok with generous amounts of glue. It’s all a learning curve!

I popped the top on, just to see how the thickness relates to the proportions of the cabinet. I’m really pleased with this, having drawn up the cabinet myself. I figured finishing the panels with oil might have saved me valuable time, but in reality, it’s a pain in the ass. You’re constantly aware of scratching them. I won’t be doing that again.

Categories
Bench planes College Millers Falls

College course: Day 8

Feels like time is fast running out to get this little cabinet up and on it’s legs, but hopefully it will be standing by next week.

I did quite a bit on the connecting rails this week, to join one side panel to the other, but spent the rest of the time smoothing the panels with a nice ‘Millers Falls No.18‘ bench plane.
Millers Falls No.18 bench plane
This plane came in a job lot of tools I bought from a gentleman in Romford last week. A fascinating chap, who used to be a pattern maker for the Ford Motor Company in Dagenham. We spent a good couple of hours chatting and he did me a great deal on a bunch of nice tools.

I ended up selling the plane to a colleague on the course who likes Millers Falls, as I already have a large Stanley jointer, and a Stanley 4 1/2. During the course of the day, Alex sharpened up the iron on the Tormek and got the plane cleaned up. I was lucky enough to have a go with it on my cabinet, and I have to say, it was one of the nicest planes I’ve used. It had a really good heft to it, and with the razor sharp blade, was taking fantastic shavings.

Think I’ll end up looking for another one of these at some point. Millers Falls have been on my radar for a long time, but being US-made, whenever I see one for sale, I usually get put off by shipping charges. Quite how this one ended up being used by a craftsman in Romford, I don’t know. I should have asked!