A few more passes and you just have to make sure things look symmetrical. Easy for me to say, I was just snapping photos.
When I have a bit of downtime, I sometimes log into my ‘webstats’, so see which posts (if any!) are considered to be popular on my blog.
Always in the top of the league was a rather ‘cobbled-together’ post about making sash and using ‘templets’ for coping the joints of your glazing bars.
Whilst at Richard Arnold’s open day the other day, I had the pleasure of seeing Richard use these sash templates and their associated planes and I will soon post a few pictures about the technique, because I think people are obviously a little confused as to how they are used.
In the meantime, however, I’d like to show a series of pics of Richard sticking glazing bars before he starts considering the joints, because there are two quite surprising things I learned from his technique. I hope you will also find them interesting.
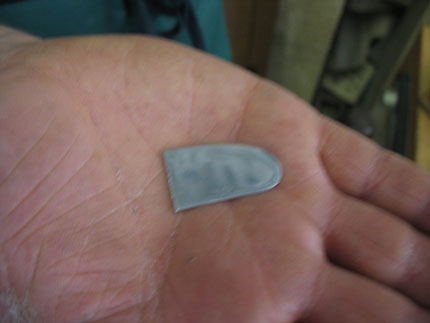
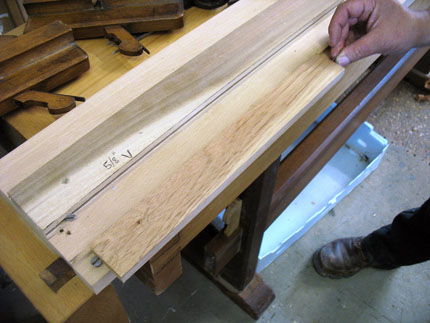
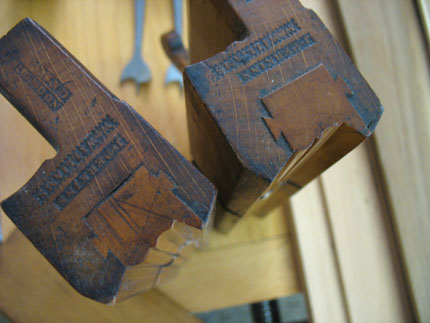
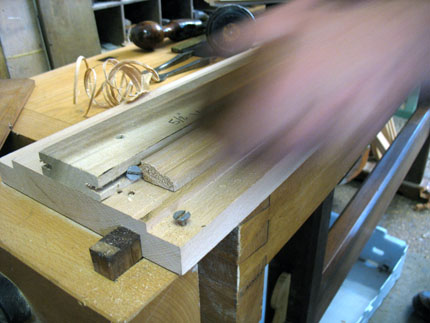
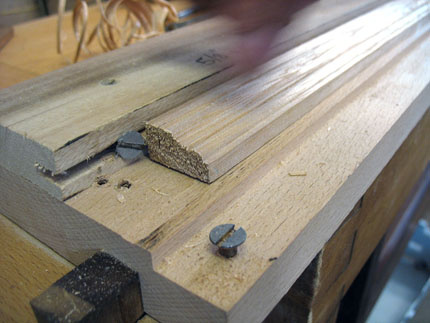
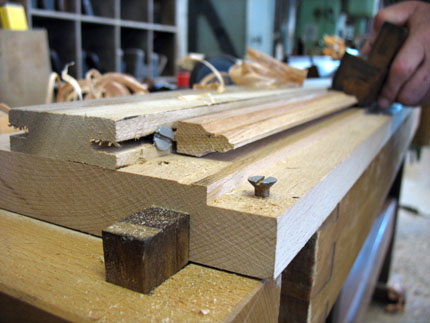
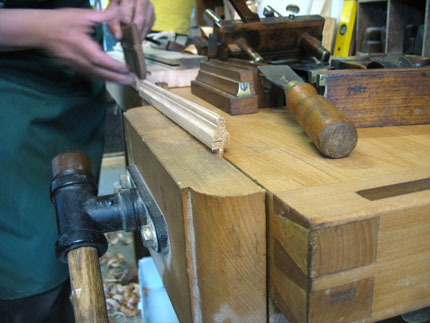
Any idea what this is? No? it’s the tip of a simple cutlery knife. Richard has cut it off and ground the edge to make it sharp. he uses it as a ‘bench knife’. Now, I always thought a bench knife was a simple knife that might have been left lying around on a bench, something that might have been used for simple tasks.But no, Richard explained. Once your stock for your glazing bar is captive at the front end of the sticking board, you need a moveable element that will hold the other end. Bearing in mind your stock will be different lengths, it needs to be simple. Bring forth the ‘bench knife’. Here, Richard slots the sharp edge into the end of the stock.A few quick taps and that little blade is biting the stock and securing it to the sticking board. Note it is also small enough not to impede the use of your planes.The glazing rebate is taken out with a sash fillister. Working from the outer face (which will in fact be on the inside of the window), the upper glazing rebate is worked.Cutting until the sash fillister bottoms out. You would work out the thickness you require for the glazing bead, then the rebate needs to be half the depth that is left once that thickness is taken away from the thickness of the stock.Richard flips it over and works the other side to the same depth.Now look. The glazing bead is slotted into a rebate on the sticking board to hold it securely. That also has a screw to hold it, but transversely. Interesting. I think Richard just tapped the bench knife back in again after this.Out come the sexy sash-ovolo planes with dovetailed boxing. Ooh, matron! Do you know why these often came in pairs, which looked almost identical? it’s not the reason you’re thinking. You’ll have to ask Richard.Off he goes, shaping first side. The planes are sprung, but you still need to keep your eye very much on holding the correct profile.Nearly there!Again, the bead is held by the rebate for working the other side.A few more passes and you just have to make sure things look symmetrical. Easy for me to say, I was just snapping photos.All that remains is to take of any sliver that might be clinging to the meeting of the top bead. This can be done with an appropriately-sized hollow plane.
Missed this Gary, then found it through Richard’s feature on that knife! Great pics. I like the knife better used with sticking board – no plans to go sticking one in my benchtop.


One reply on “Richard Arnold’s glazing bars”
Missed this Gary, then found it through Richard’s feature on that knife! Great pics. I like the knife better used with sticking board – no plans to go sticking one in my benchtop.