Categories
College Practical techniques

Back to school

This week, I’ll be going back to school, well, university to be exact. I’ve decided to finally get back to doing something I enjoy, rather than devote 100% of my time to designing for publishing.

And so life is dividing itself a little. My Fridays will now be spent at London Metropolitan University, with a small group, devoted to learning the craft of furniture and cabinet making, something I’ve become fascinated with in the last couple of years.

It’s ridiculous of course! People are living in smaller houses. They don’t have big money to spend on handcrafted furniture. They have faster-changing tastes, brought on by the rise of advertising and consumer culture. The ‘need’ has been surpassed by the ‘want’.

And you know what? I don’t care. It’s not about making things to sell. I’ve been heartened by folks around me who have re-discovered the value of learning a craft and enjoying the process, rather than racing to the end product.

And so, as the one reader of this blog will already be aware, I’ve been amassing old tools, quality tools from British manufacturers, some of whom sadly don’t even exist anymore. I’ve been introduced by friends to people who produce the most amazing work, old fellows who have so much knowledge, hands that have been making things all their lives.

It’s also been enlightening, when I mention building a tool collection and starting my learning process, the amount of people who talk so openly about relations or friends who were in the business. ‘I think I still have some of his tools in the loft!’.

So Friday I start learning all over. Somehow scraping a living from this may, or may not come later. It might become a part of my life, it may not. For the time being, I’m just enjoying having a new challenge beyond life in front of a computer.

Categories
People

We’ll miss you, General Woodwork Supplies!

General Woodwork Supplies
One of my favourite local shops closed on Saturday, General Woodwork Supplies of Stoke Newington. The finest shop in the area for timber, ironmongery and every screw, fixing and widget on the planet. I’ll leave it to the more-than-capable Spitalfields Life to give you the history, (very pleased the “Gentle Author’ covered this one).

The last thing I personally got from the store was hardwood, for replacement treads on the stairs in my old Victorian house. Realising I’d left things late (with three old stairs already knocked out), I asked Michael if he could cut up nine treads within the hour for pick up. ‘No problem’, he said.

They were waiting for me when I got back, (10 minutes early). Proper service, proper gents!

Categories
Chisels Marples & Sons Sorby Ward

Gathering chisels

Group vintage chisels
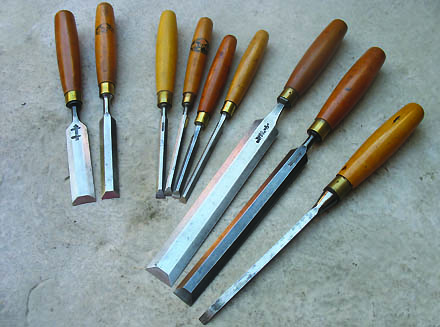
Six various makes and sizes of bevelled chisels, two larger paring chisels, and far right, a mortise chisel.

Chisels come in a variety of guises. Bevelled, mortise, gouges, cranked gouges, cranked bevelled, paring, , the list goes on and on.

Two things I love about vintage chisels though, are beautiful boxwood handles and the fact most of the good makes were made from ‘carbon steel’, or what was known as ‘forged’ or ‘crucible steel’. Meaning the blades were forged, ie hammered under heat, and the resulting edges and steel composition reflected that in the quality of the blade and the edge it can hold. And these old chisels really do hold their edge. Put a standard bevel of approximately 25 degrees on them, with a further honed edge, and they are sharp!

There are many different modern varieties of chisel out there now, some of them excellent, like the Lie Nielsen range. The debate over A2 steel or O-1 steel really comes down to whether you want to sharpen your blades more or less often. O-1 steel can be sharpened to a higher degree, with a more shallow bevel, but you will have to sharpen more often.

I’ve started here collecting decent English makes with boxwood handles. Basic bevelled chisels will be good for the majority of jobs, and various sizes will allow you to work on variously sized work, such as finer dovetails. If you really want to get specialized, you can get special ‘dovetail chisels’ which have almost non-existent shoulders, ie the narrow flat along the edges of the chisel. This allows you get right into the dovetails to pare very cleanly. If you’re really smart, you can make your own!

There are a million videos about creating your own dovetails on the web if you want to experiment. I’ll be doing a long post on this at some point when I start making my own. However, here’s a decent video on ‘Woodtreks’ of Craig Vandall Stevens doing a decent job.

Paring chisels are, well, for paring. They are much flatter in profile, which allows you to run flatly along the workpiece much more easily, paring away small amounts of stock.

Mortice chisels are obviously for making mortices. Here’s Frank Klausz, doing it properly. They are designed to be hammered, they’re much more solid, with a square section blade, rather than flattened.

For the time being, I’m collecting bevelled and mortise chisels, the types and sizes I think I’ll use the most for my particular work. From then I’ll move onto a couple of in-cannel gouges, for cutting out small curved sections, such as overlapping mouldings.

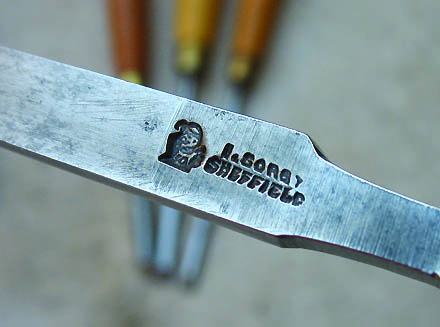
Vintage bevelled chisel by ‘Ward’ of Sheffield, UK.

Vintage bevelled chisel by ‘Marples & Sons’. Note ‘shamrock’ logo.

Vintage bevelled chisel from ‘Sorby’. Note ‘Mr.Punch’ logo.

Vintage ‘Marples & Sons’ bevelled chisel, with grinder marks put on by previous owner for identification.

Categories
Measuring & marking

My saviour, the bevel gauge

Bevel Square

First blog post for a while, due to summer holidays and a some work on the house. One of the jobs I finally got round to doing this weekend, was building some doors to enclose the space under the stairs. My little bevel gauge was invaluable for setting the correct angle when slicing up the mitres for the inset mouldings.

Mitre cutsMitre cuts

If I had the time (and space) I’d be building the doors with mortise and tenons, using moulding planes for the insets and generally be having a very nice time.

For the time being, (more posts about this later), my space at home is restricted, not even having a bench to work on, so had to cut a few corners! ‘BADA-BUMMMM!”

Seriously though, I really do need a bench and a space to put it. <sigh>

Categories
Stanley

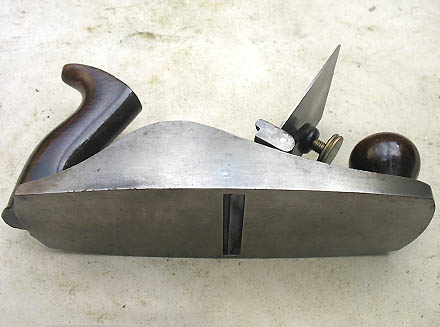
Stanley #112 scraper plane

Stanley 112 scraper plane
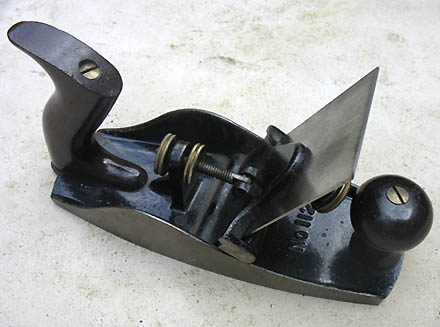
Stanley 112, with typical rosewood knob and tote. This model has straight blade, but you could also buy toothing cutters, (basically the same cutters available for the Stanley 12).

I spent so long looking for a good, unadulterated, original one of these, that in the end I bought one from a dealer. The Stanley #112 is a scraper plane, basically a mixture of the Stanley #12 and a Stanley No.4 smoother. It’s used to scrape a fine finish over stock and has no other uses. And of course, there are new models out there, and obviously Lie Nielsen has a pretty much exact copy for sale. However, if you know me, you’ll know I always prefer to go ‘old-skool’, so I wanted to find an original Stanley.

Stanley 112 scraper plane
The plane holds a titled blade, the angle of which is described by the rear adjustment nut. With the angle set correctly, and a sharp, hooked ‘burr’ created on the blade edge, forward movement of the plane will scrape a mirror finish on your stock.

The performance of the plane very much rests on setting and adjusting the angle of the blade. Not getting it right will produce a teeth-grinding chatter, akin to the kid drawing his fingernails across a blackboard. Correctly setting a ‘burr’ on the cutting edge is also very important. This is known as ‘burnishing the blade’. You’ll need a hard steel rod (or proper burnishing tool) and a vise. Basically, you’re trying to create a small sharp hook all the way along the bottom of the blade. This sharp hook is the fine edge that scrapes the stock, when held at the correct angle in the plane.

Stanley 112 scraper plane
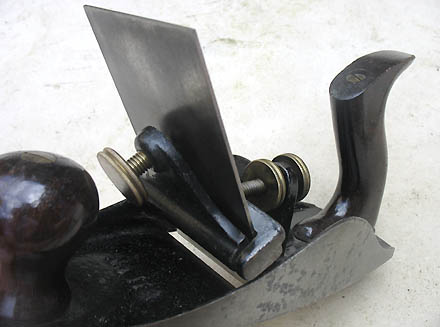
The blade is a later version, with straight edges on the width. Earlier (and rarer) versions had a bevel either side on top edge, to eradicate scary 90 degree sharp corners.

When it comes to fine-tuning the blade, some people will swear by the original Stanley blades, which are markedly thinner that some new production replacements out there today. However, the excellent Hock Tools, who make a new, thicker blade, have a good write up on their site about how to create that all-important burr.

Stanley 112 scraper plane