Out withe the spokeshave. When you get a spokeshave sharpened up and dialled in, there really is no nicer tool to use. The finish on the edges of these sides is glass smooth.
Glad to say I’ve finally found a workshop close to me that I can call home. The workshop is blessed with old machines and even better, other people from whom I can learn a lot about traditional joinery. It feels like every day I conquer a new technique with my hand tools, or learn a better way to do something on one of the machines.
I’ve been waiting on a client to give the go-ahead on the next job, so thought I would put together a saw till to get my saws neatly organised.
This wall-hung design relies on the saw totes resting on a bottom bar and the plates of the saws are held in place by kerfs in blocks further up. it will all make sense as you see it come together.
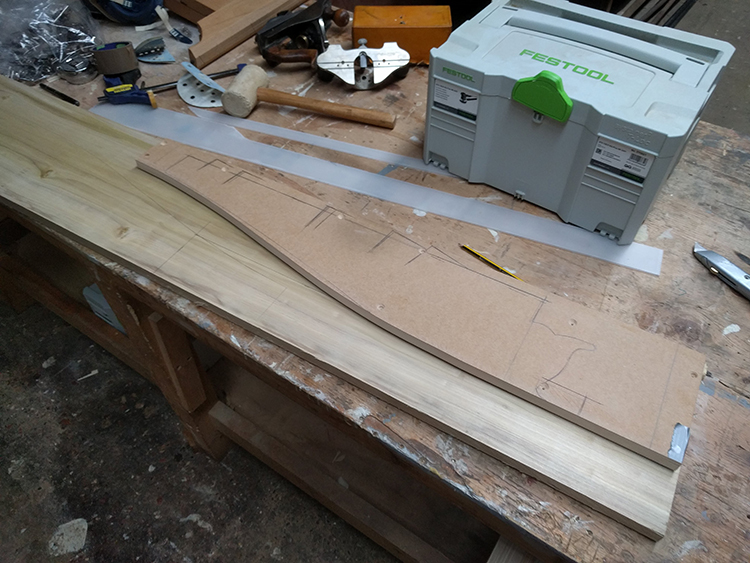
If you’re going to make one of these, I would choose something more hard-wearing than the Poplar I have lying around. I’ve gone with softwood, purely because I have a chunk left over. I plan to make another till in the future from a denser timber, but this will do for now. I laid my various saws onto a piece of mdf and keeping the horn of the tote in the same place, sketched out where the saw would fall if it was leaning into the till. I have a mix of tenon, dovetail and larger saws.
I cut this out to a nice curve, the shape of which will be the side of the saw till. You don’t have to have a curve, just go straight if you like. If you’re planning on using a router to cut your curve, you can of course use your mdf template. Just sand it nicely and clamp it over your timber with a bearing bit to follow the shape. I wanted to use hand tools, so I just used the template to trace the sides. Two sides fitted onto my scrap timber. I made a concession to machines and roughly cut the sides on a bandsaw. Out withe the spokeshave. When you get a spokeshave sharpened up and dialled in, there really is no nicer tool to use. The finish on the edges of these sides is glass smooth. So there we are, two matched sides. This will be the bar across the front of the till. It will tie the sides together, but as it’s also on the front, I’ll put a dovetail on both ends, rather than use screws. Dovetails are cut, but I might also cut back the depth of the dovetail before I rebate it, so the bar definitely won’t show the joint. I’ll do a bit more tomorrow. Then it’s back stretchers in too. They can be screwed as you won’t see them, but they do need to be rebated as well. There enough space below the bar to hopefully get a small drawer in here, so I can maybe use that for saw files, etc.