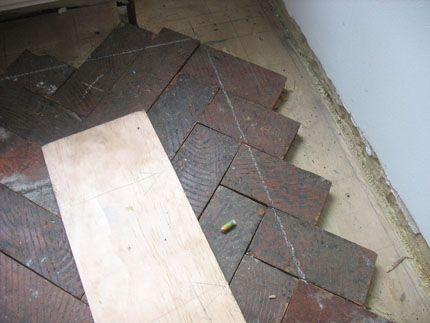
Work out how your corners will meet and run the pattern up to the next corner each way, so you don't get any nasty surprises with very slim blocks having to be cut. If you need to go long or short to make the next corner, take a little off each block, then by the time you get to the next corner, no-one will notice the shorties, just your magnificent corner.
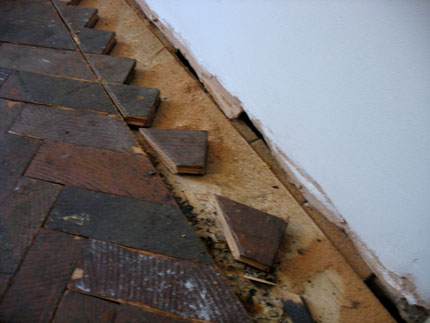
(nb: A couple of my block bits have popped out here when I was removing the waste. I've saved them and will glue them back in later).
Ok, a few hours free this morning, so a bit more work on the floor. As I walked into the kitchen I got the cold feeling of dread for the first time on this project as I once again saw the acres of dirty brown parquet. Whenever you do a decent-sized diy job, I find there’s nearly always an ‘over-the-hill’ moment. A moment when you have achieved a certain amount, but when you need to push yourself to get the rest finished!
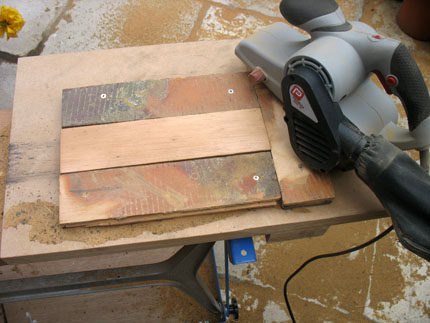
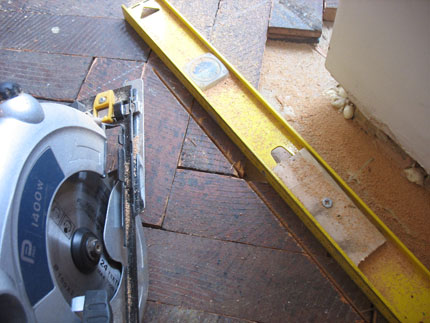
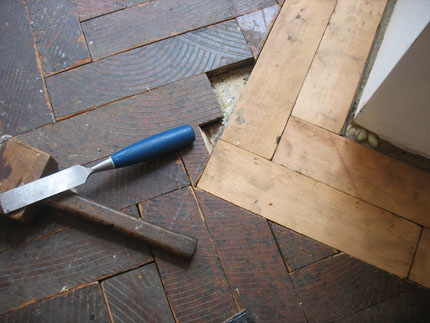
I figured the best way to get my head into gear was to get on and do some work around the perimeter of the room, at least then I can ‘sign-off’ various parts of the kitchen knowing they are finished up to the wall, with only sanding and sealing to do. As I’m not removing radiators in the kitchen, I’d quite like my border blocks to be half-finished, or I’ll never be able to sand them down as they are, once they’re cut around rad pipes. I set up a simple jig outside to hold individual blocks, by screwing three waste blocks to a board. The blocks simply slots in and is held whilst being worked on, by it’s own tongue and groove. The blocks will still need some sanding, but this should make life a lot easier around those tricky bits. An easy way to make sure you are the right distance away from the wall all around the room is simply to cut a board and use that for your line. I want, want, want a Festool TS55, but until I feel flush enough a make-do solution is a level that’s screwed down through it’s holes to give you a hacked guide rail! I’ve already set the saw so I know that running the saw rail along the level will get me on the line. That’ll do nicely. Slightly crap picture here, probably due to hysterical shaking with the success of my spirit level guide rail. Chopping out the waste with old chisel. (While you’re at it take off any big lumps of set glue and anything that might make for a dodgy line when the border goes in). Work out how your corners will meet and run the pattern up to the next corner each way, so you don’t get any nasty surprises with very slim blocks having to be cut. If you need to go long or short to make the next corner, take a little off each block, then by the time you get to the next corner, no-one will notice the shorties, just your magnificent corner. (nb: A couple of my block bits have popped out here when I was removing the waste. I’ve saved them and will glue them back in later). So just carry on round the room like this and that’s your perimeter done. This will take me a while, so another post soon.
2 replies on “Laying a parquet floor (Part Three)”
How did you manage the tongue and groove with the perimeter? Since these blocks don’t have anything to slot in to, am I right in assuming that the two perimeter blocks fit together, but then it’s just the glue holding them in place? Did you use any secret nailing with any of your parquet installation?
hi, I didn’t use any secret nailing, but you could do that. I didn’t have a nailer at the time I did this, but probably would do that now. The perimeter blocks had their tongue removed, so yes, those were just glued in place.