Quick post about two lovely shoulder planes I recently found. The maker is G.Miller, of 24 Ampton St, Grays Inn Road, London. He was active at this address between 1890 and 1914. Miller, late to plane-making, concentrated mainly on shoulder planes, but his chariot planes are also lovely, and a little rarer. Miller did not always add his stamp and indeed only the smaller plane of these two is marked. The shoulder planes are made from gunmetal, which was typical of Miller’s style, with a thin steel sole ‘sweated’ on with silver solder. The infills on the planes are made from ebony.
I buy old, good quality woodworking tools. If you have any tools you would like to sell, please get in touch using the contact form on the home page.
Very pleased to have sourced this rare plane. Now I finally have it in my hand, it’s very interesting indeed. It’s a ‘bead cluster’, or ‘cluster bead’, depending on who you’re talking to. The iron cuts a series of stepped rounds, piled on top of one another, probably best shown by this picture I found on the web.
I’m already a fan of John Moseley, largely due to the London connection, but also because his planes are so precise and well-made. I would like to know more about how and where the moulding this plane produces is used. I figure in fine casework certainly. Perhaps over a shutting joint, where one might have used a rebated astragal or similar, this would give an elegant alternative?
Any info gratefully received. At the price I paid for this, I won’t be posting any pictures of the plane in use, which goes totally against my philosophy of tools having to be used. Ho-hum, you make rules, you break them.
I buy old, good quality woodworking tools. If you have any tools you would like to sell, please get in touch using the contact form on the home page.
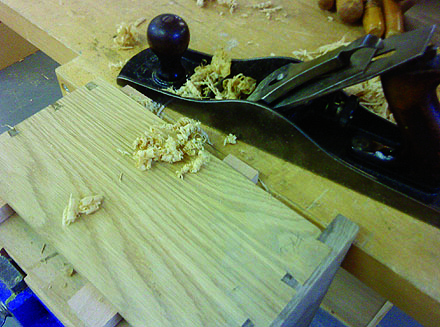
I offered the drawer up to the cabinet and it needs a little off the sides to go in. This is a good thing. It allows me to try to get a really good fit, and I can clean up the faces of my joints at the same time. Here I'm taking fine shavings off each side, whilst checking the fit again and again.
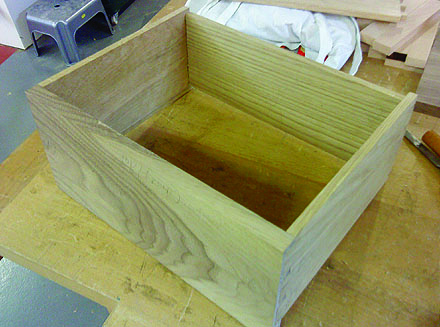
All too soon, here I am. The final day of my short course at John Cass. Lots to do today, and I have to finish this cabinet, what with having nowhere to work at home. Onward. Well, after making a total hash of the back of this drawer last week, I rapidly made another one. Thankfully, it all fitted and here’s the drawer being glued-up. You can see the bottom of the front of the drawer drops down below the base. This is because, on closing, I want the drawer to cover the bottom-front rail of the cabinet. And so, we have a drawer! I checked the drawer for squareness, using a rule across the diagonals, and they measure the same. Things should be square and the drawer should fit. The rear of the cabinet has it’s top rounded over, the traditional way to finish this. I’m still not sure why this is. By the way, the rear and sides of the drawer are oak, which is nice and strong in these relatively thin pieces and it gives a nice contrast to the dark walnut on the lapped dovetail joints at the front. I offered the drawer up to the cabinet and it needs a little off the sides to go in. This is a good thing. It allows me to try to get a really good fit, and I can clean up the faces of my joints at the same time. Here I’m taking fine shavings off each side, whilst checking the fit again and again. Time out from the drawer for a while, and we drilled a slot in each side of the cabinet inner, with a Festool Domino. Later on I’ll fit ‘buttons’ in these slots to allow joining the cabinet top. More on this later. The final cabinet. The drawer runs smoothly, (which was my main concern), and the whole cabinet should look nice once all the surfaces have the oiled finish that’s currently only here and there. I’ll post a final set of pics once I have that done. Phew! Tools in the rucksack and exit stage left.